

How to start a subscription ?
Context
Section titled “Context”For a customer to access your service and, most importantly, for you to correctly invoice them, they must subscribe to a subscription through ProAbono.
If, as we recommend, you have integrated our hosted pages, the customer can subscribe autonomously (self-service) by selecting the desired offer from the offer grid.
If, for any reason, the customer cannot subscribe autonomously, or if you need to carry out the subscription process from the back office, you can do so by following these steps:
- Create a subscription
- Choose the start options
Procedure
Section titled “Procedure”1. Access the creation form
Section titled “1. Access the creation form”- Click on “Subscribers” from the left menu.
- Click on the “+” button and then on “New Subscription”
2. Fill in the information
Section titled “2. Fill in the information”- Choose which customer subscribes to the subscription.
- Choose the offer that this customer wants to subscribe to.
3. Choose the start options
Section titled “3. Choose the start options”The start of a subscription involves choosing who validates the subscription and when the subscription should start**.**
3-1 Who validates the subscription
Section titled “3-1 Who validates the subscription”- You can choose to do it on behalf of your customer :
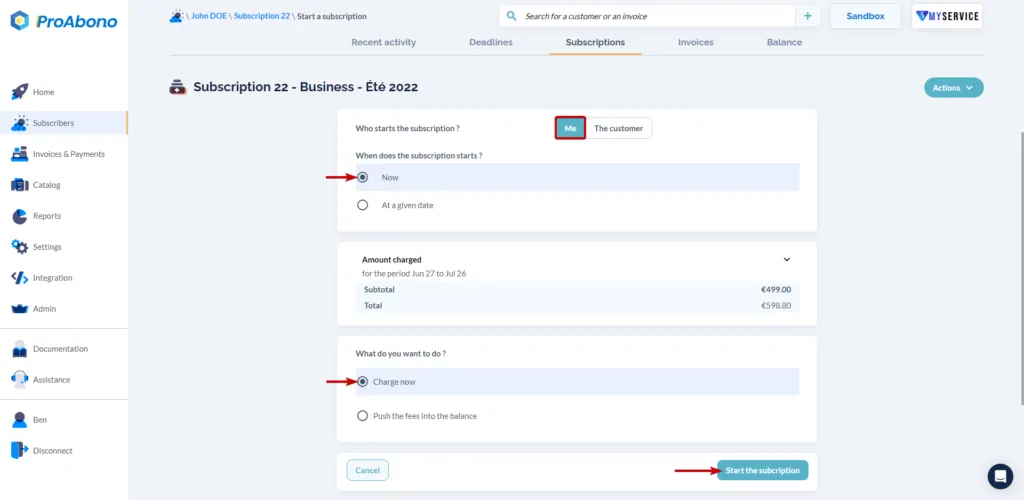
Or send them a subscription link.
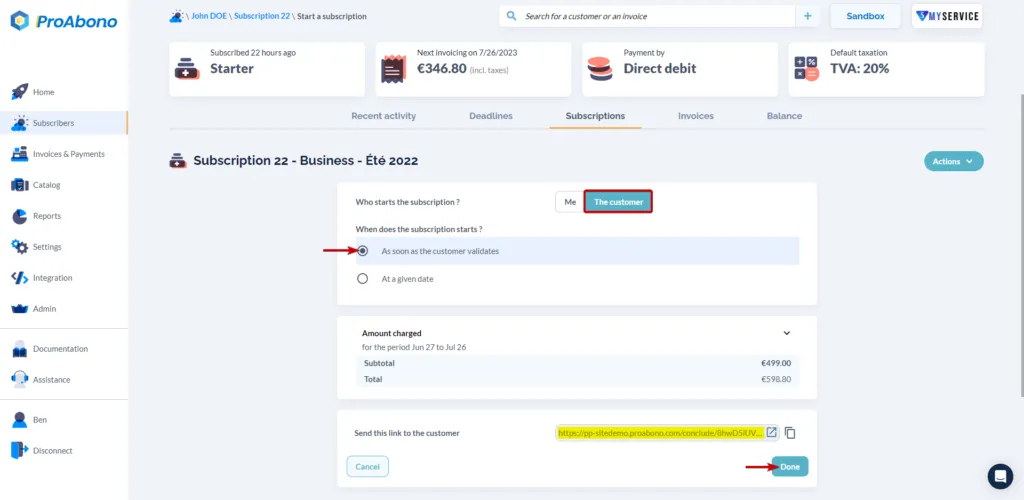
3-2 When should the start be effective?
Section titled “3-2 When should the start be effective?”By default, the subscription will start automatically upon subscription.
- Immediately if you (as an agent) are performing the action.
- When your customer completes the subscription form if you send them a link.
3-bis) Choose billing options
Section titled “3-bis) Choose billing options”By default, billing is triggered on the start date of the subscription.
However, if an agent starts the subscription, they can choose to defer billing. All fees related to the subscription will then be placed in the balance of the customer and will be billed later.
4. Validate the form
Section titled “4. Validate the form”Simply click on “Save” to apply your changes.