

WP Tuto #2 – Configure your WordPress
Context
Section titled “Context”Now that the ProAbono extension has been successfully installed and configured on your WordPress site, you need to configure it to serve as the basis for creating your ProAbono customers and subscribing to your various subscriptions.
Procedure
Section titled “Procedure”1. Allow Account Creation on Your WordPress Site
Section titled “1. Allow Account Creation on Your WordPress Site”To enable your site to manage user authentication, it is mandatory to allow your users to create an account on your site.
To do this:
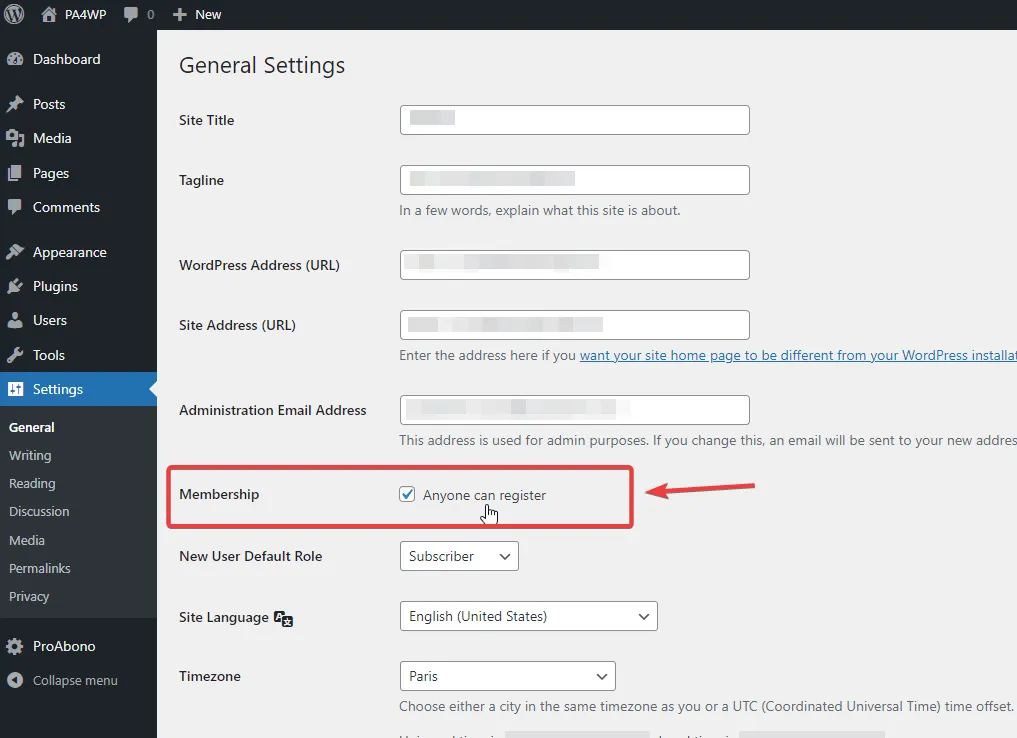
- Click on “Settings” from the left menu of your WordPress site’s back office.
- Enable the “Registration” setting => “Anyone can register”.
This will allow visitors to register on your website. They will then be able to independently log in and log out of your site.
2. Build a Menu to Display Registration, Login & Logout Actions
Section titled “2. Build a Menu to Display Registration, Login & Logout Actions”The “Users menu” plugin allows you to dynamically display menus based on the user’s login status.
This way, you can have dynamic displays based on your users’ authentication status.
Step 1: Install “User Menus”
To download this extension:
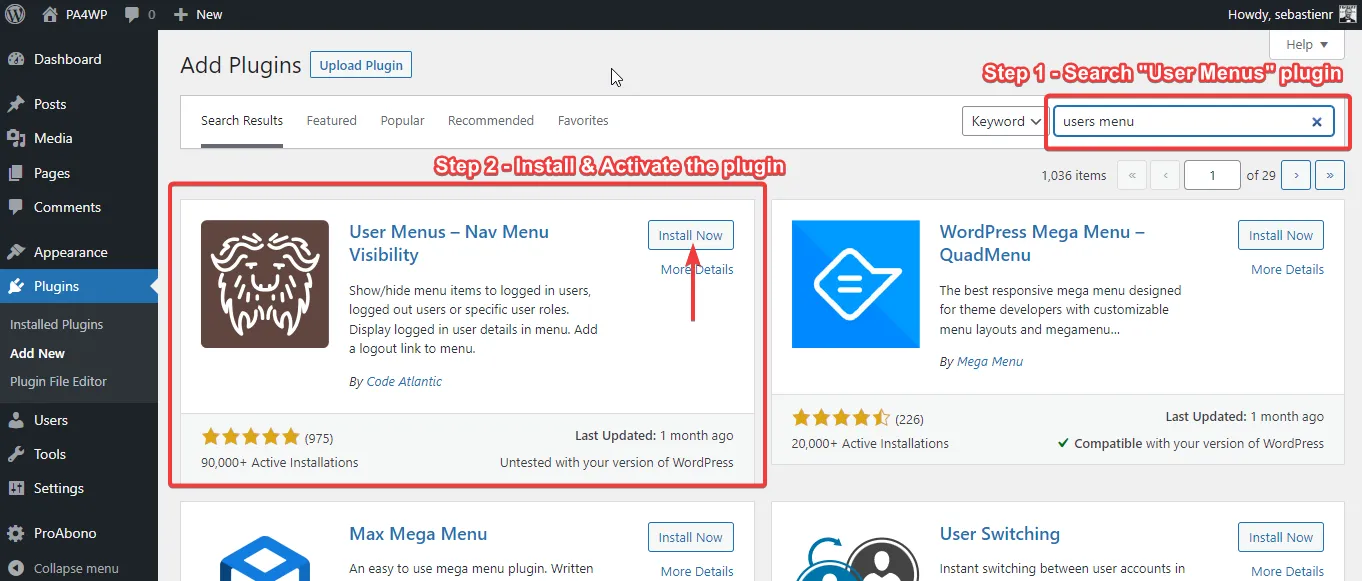
- Click on the “Extensions” section in the left menu of your WordPress site’s back office.
- In the search field, enter “Users menu”.
- Install and activate the extension.
 **Step 2: Create the Menus**
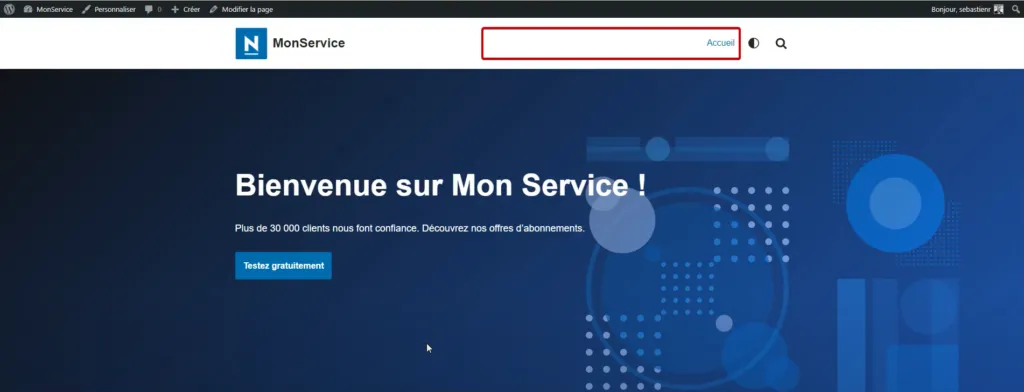
Click on the “Appearance” menu in the left lateral menu, then in the “Menus” section.
You will arrive on a page that allows you to build a menu and define its behavior.
To do this, click on “Custom Links” and start creating the menus:
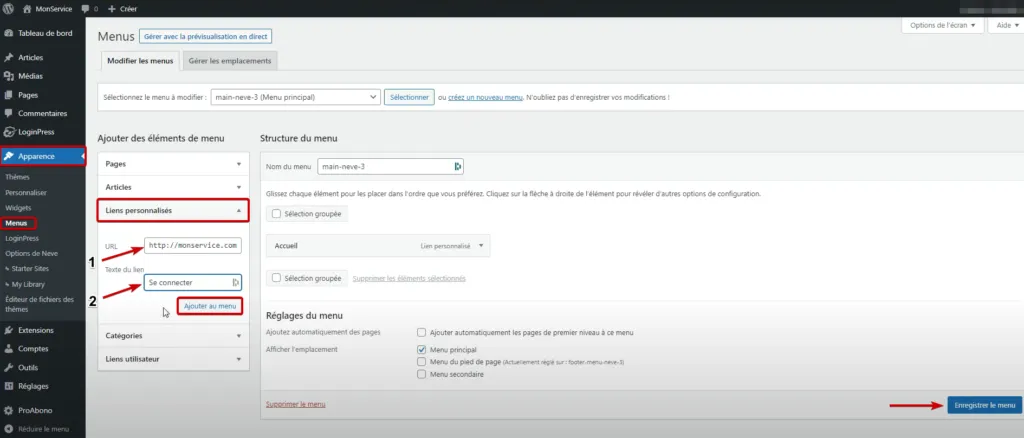
- Link Text: Create an Account URL: {YourSiteUrl}/wp-login.php?action=register
- Link Text: Log in URL: {YourSiteUrl}/wp-login.php
- Link Text: Log out URL: {YourSiteUrl}/wp-login.php?action=logout
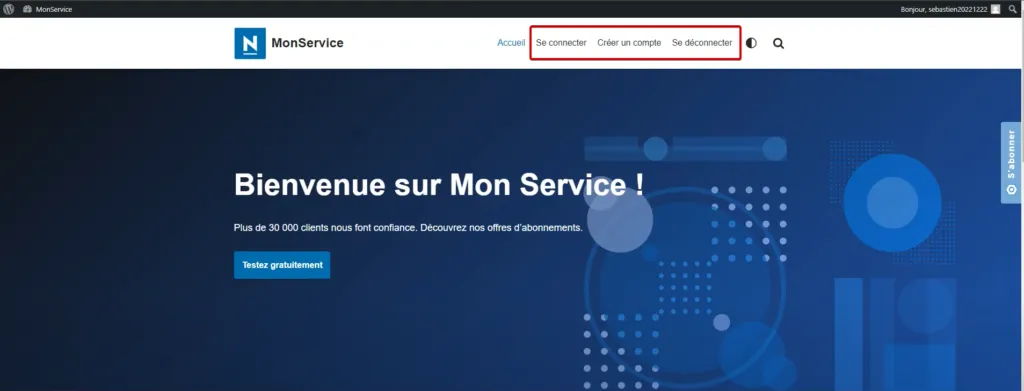
Step 3: Define Menu Behavior
In order to maintain consistency in the user experience, it is important to show/hide the actions that correspond to the user’s login status. Therefore, we invite you to modify the “Who can see this link?” field for each of the menus created in step 2.
- Menu: Create an Account Who can see this link? => Logged-out users
- Menu: Log in Who can see this link? => Logged-out users
- Menu: Log out Who can see this link? => Logged-in users
3. (Optional) Create Your “Free Trial” Workflow
Section titled “3. (Optional) Create Your “Free Trial” Workflow”As mentioned earlier in the configuration of the ProAbono plugin (see article: WordPress Tutorial #1 - Installing the ProAbono Extension), you can add the reference of a specific offer.
The goal is to automate the subscription to a subscription based on this offer as soon as a user creates a WordPress account.
If you choose to enter a ProAbono offer reference in the ProAbono extension configuration, then each account creation made from the following link:
URL: {YourSiteUrl}/wp-login.php?action=register
A customer and a subscription based on the offer will be created in ProAbono.
To create a call-to-action (CTA) or “Free Trial” button on a page, you simply need to:
- Edit the relevant page
- Create a button and associate the text “Free Trial”
- Set the link to: {YourSiteUrl}/wp-login.php?action=register
Now that these elements are configured, let’s move on to the step to improve and customize the registration and account creation page of your WordPress site.